Related News
Nail Selection and Installation Techniques for Installing Cedar Shingles
Apr . 23, 2024 17:20
## Nail Selection and Installation Techniques for Installing Cedar Shingles
### Introduction
Cedar shingles are a popular choice for roofing due to their durability, natural beauty, and insulating properties. Proper installation of cedar shingles is essential for ensuring their longevity and performance. One of the most important aspects of shingle installation is selecting the right nails and using the correct nailing techniques. This article will provide a comprehensive guide to nail selection and installation for cedar shingles, ensuring a successful roofing project.
### Nail Selection
The type of nails used for cedar shingles is crucial for their holding power and resistance to corrosion. The following factors should be considered when selecting nails:
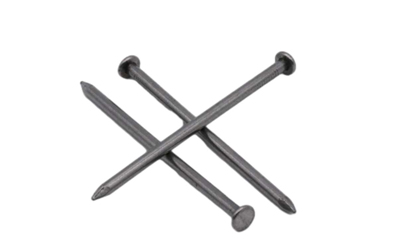
**1. Material:** Hot-dipped galvanized steel nails are the preferred choice for cedar shingles. They provide excellent corrosion resistance and have a strong holding power.
**2. Size:** The length of the nails should be appropriate for the thickness of the shingles and the underlying roof deck. Generally, 1-1/4 inch nails are sufficient for 1/2-inch thick shingles, while 1-3/4 inch nails are recommended for 3/4-inch thick shingles.
**3. Shank Type:** Ring shank nails offer superior holding power compared to smooth shank nails. The rings or barbs on the shank prevent the nails from pulling out over time.
**4. Head Style:** Flat head nails are the most common type used for cedar shingles. They provide a clean and inconspicuous appearance when driven flush with the shingle surface.
### Installation Techniques
Once the appropriate nails have been selected, it is essential to use the correct nailing techniques to ensure a secure and durable installation.
**1. Nailing Pattern:** Stagger the nails in each course to distribute the load evenly and prevent splitting. For single-layer installations, drive two nails near the top and one nail near the bottom of each shingle. For double-layer installations, drive two nails near the top and two nails near the bottom of each shingle.
**2. Nailing Depth:** Nails should be driven flush with the shingle surface, but not so deep as to damage the underlying roof deck. A good rule of thumb is to leave about 1/8 inch of the nail head exposed.
**3. Nailing Angle:** Nails should be driven perpendicular to the shingle surface. Angling the nails can weaken their holding power and lead to premature failure.
**4. Roof Pitch:** The nailing pattern and depth may vary depending on the pitch of the roof. Consult the shingle manufacturer's instructions for specific guidelines.
**5. Overhanging Edges:** Leave about 3/8 inch of the shingle overhang beyond the drip edge. This overhang allows for expansion and contraction of the shingles during weather fluctuations.
### Additional Tips
**1. Pre-Drilling:** Pre-drilling pilot holes in the shingles can prevent splitting, especially when installing thicker shingles.
**2. Use a Nail Gun:** Using a nail gun can speed up the installation process and ensure consistent nail depth.
**3. Protect the Nails:** Applying a sealant or roofing cement around the nail heads can further protect against corrosion and moisture penetration.
**4. Inspect Regularly:** Inspect the shingles and nails regularly for any signs of damage or corrosion.
### Conclusion
Proper nail selection and installation techniques are essential for the longevity and performance of a cedar shingle roof. By following the guidelines outlined in this article, you can ensure a secure, weather-resistant, and aesthetically pleasing roof that will protect your home for years to come.
Copyright © 2025 Hebei Minmetals Co., Ltd. All Rights Reserved. Sitemap | Privacy Policy

